Applies To: Construct 2, CefSharp, VB.NET, WinForms, jsMessage
In my previous post, Embedded Chromium in WinForms, I walked you through creating a simple WinForms application that will load local html resources into an embedded Chromium browser using CefSharp. This article will build on that application to show you how to host Construct 2 games inside your WinForms application. Additionally, I will show you how to use my Construct 2 jsMessage plugin to communicate directly from .NET code to your running game.
Hosting a Construct 2 Game
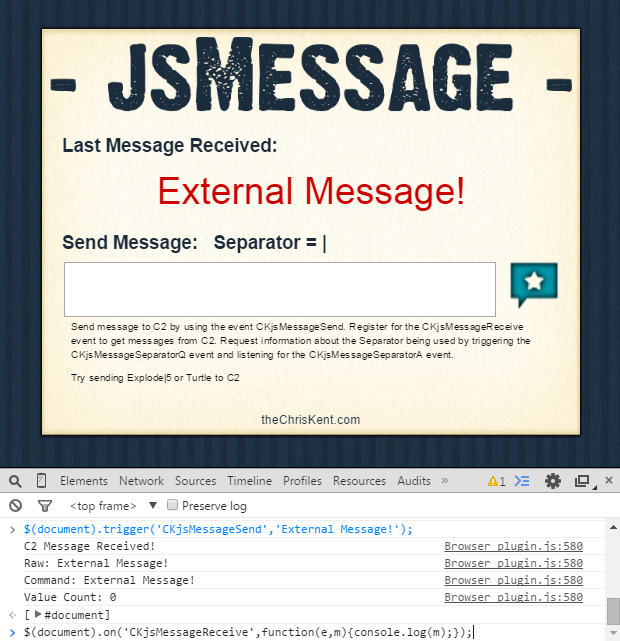
For this article I will be using the jsMessageTest Basic game available on the jsMessage CodePlex site as an example download. You can use either the paid or free versions of Construct 2 to create the resources but you will need to install the jsMessage plugin. More details about this plugin and about the example game we’ll be using can be found in my posts, Introducing jsMessage for Construct 2 and jsMessage Basic Example.
You can also just use your own game or one of the many sample games that comes with Construct 2. However, you won’t be able to follow along with the Sending/Receiving messages section of this post without the jsMessage plugin.
Building the Game
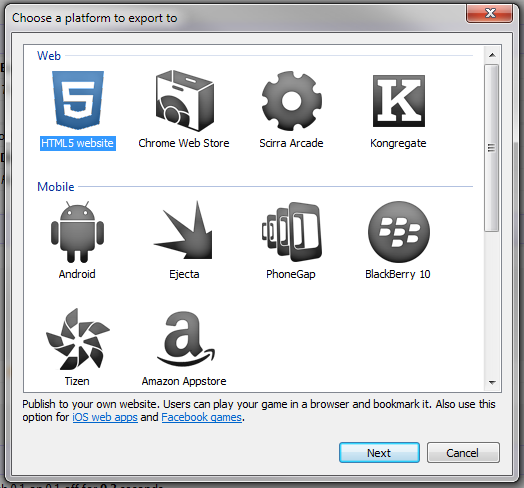
Open the jsMessageTest Basic.capx in Construct 2. Choose File > Export project… In the dialog, choose HTML5 website and click Next:
In the Export Options dialog choose the location as a C2 folder inside your application’s directory (mine is bin/x64/debug/C2). You also need to uncheck the Minify script checkbox. I’m unsure of the reason but currently you will receive an error in the console if you attempt to load a game that has been minified using C2. I suspect this is an issue with the version of Construct 2 I am running but it could easily be CefSharp. Either way, uncheck the box for now and click Next:

Choose Normal Style in the template options and click Export.
Loading the Game
Assuming you are using the same WinForms project created in my Embedded Chromium in WinForms post you can just switch the address in the browser constructor to local://C2/index.html
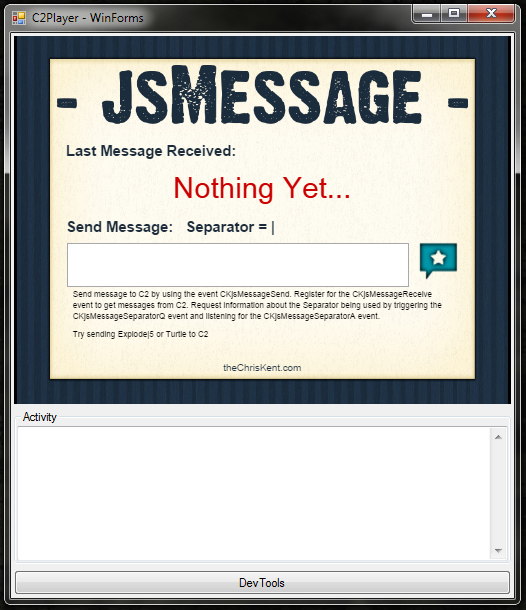
Go ahead and run the application. If the game shows up for you, fantastic!
Unfortunately, I get a blank screen when using the default settings. I’m able to fix this by disabling the GPU hardware acceleration. This is a known issue with certain versions of Chromium when paired with specific drivers/hardware. If you have this issue, you can easily pass Chromium Command Line Switches using the CefSettings object in CefSharp. We can do this by adding this line right before we call the Cef.Initialize function in our Form constructor:
settings.CefCommandLineArgs.Add("disable-gpu","1")
When you run the application it should look similar to the following:
This “game” doesn’t have much to offer without some additional plumbing (see below) but it is fully interactive. If you were to switch it out for a platformer game or something similar you would see that all the key presses, clicks, etc. are all passed just like you’d expect!
Sending Messages to Construct 2
The jsMessageTest Basic game was built with the jsMessage plugin. This plugin allows the game to respond to jQuery events and to trigger events of its own. You can find a lot more detail about how this works with this game in my post, jsMessage Basic Example.
It’s really pretty straightforward if you’re familiar with jQuery events so we won’t be spending much time on explaining it. Suffice it to say we are going to be injecting JavaScript in to our browser that will allow us to interact directly with the game from the code.
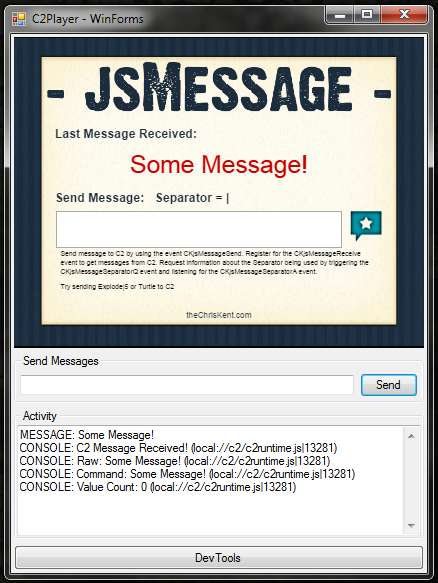
I’ve added a GroupBox labeled Send Messages and inside I’ve put a TextBox called txtMessageToSend and a Button called btnSendMessage. Here’s the code for the btnSendMessage Click EventHandler and the helper sub SendMessage:
    Private Sub btnSendMessage_Click(sender As Object, e As EventArgs) Handles btnSendMessage.Click
        If Not String.IsNullOrEmpty(txtMessageToSend.Text) Then
            SendMessage(txtMessageToSend.Text)
            txtMessageToSend.Text = String.Empty
        End If
    End Sub

    Private Sub SendMessage(Message As String)
        If browser IsNot Nothing Then
            addActivity(String.Format("MESSAGE: {0}", Message))
            browser.ExecuteScriptAsync(String.Format("$(document).trigger('CKjsMessageSend','{0}');", Message))
        End If
    End Sub
In the Click EventHandler (lines 49-54) we’re just making sure there is a message to send, calling the SendMessage sub and clearing the txtMessageToSend box.
The SendMessage sub is doing the actual interesting work. First, we verify the browser is setup. Then we use our addActivity sub to log the message. Finally, we call the ExecuteScriptAsync method which allows us to execute JavaScript directly on the page within our browser. This JavaScript triggers the CKjsMessageSend event with our message as the parameter (this is the format expected by the jsMessage plugin).
Run the application, type something in the box and click Send and you should have something like the following:
Receiving Messages from Construct 2
Construct 2 can send messages via jQuery events using the jsMessage plugin. We can easily register a JavaScript function to be performed when that event is triggered. But how do we respond to that with .NET code?
CefSharp provides the ability to expose a .NET class to JavaScript. This is totally awesome. There are some limitations regarding the complexity of the objects and their return types, etc. all of which you can find on their project page. For our purposes, we just need a simple proxy object that can accept messages and route them.
Add another class to your project called MessageReceiver.vb and copy/paste the following code into it:
Public Class MessageReceiver

    Private logReceiver As Action(Of String)

    Public Sub New(LogReceiverAction As Action(Of String))
        logReceiver = LogReceiverAction
    End Sub

    Public Sub log(Message As String)
        logReceiver(String.Format("RECEIVED: {0}", Message))
    End Sub

End Class
This is not particularly exciting code but it should illustrate what is possible. It should also look somewhat familiar if you followed the steps to make our LogDialogHandler object in the last article. In our constructor (lines 5-7) we accept an Action(Of String) which we will use to handle our logging. We store this Action into our private logReceiver object (line 6) so that we can use it later.
There is just one method, log, which takes a string, adds “RECEIVED:” to the front of it and calls the logReceiver action. I’ve lowercased this method to match what will happen once exposed to JavaScript. CefSharp automatically changes methods and properties into JavaScript-casing (the first letter is downcased). I find it less confusing to just do that directly in the object.
Now we just need to register our object into our browser. We can do this once the browser is initialized using the RegisterJsObject method. Here is the line of code to do that in the Form constructor right after setting up our JsDialogHandler:
browser.RegisterJsObject("messageReceiver", New MessageReceiver(New Action(Of String)(AddressOf addActivity)))
The RegisterJsObject takes 2 parameters: The name we want to use in JavaScript for the object and the object itself. In our case we want it called messageReceiver (this will be a global object) and we just create a new instance of our MessageReceiver pointing the logReceiver Action to our addActivity method.
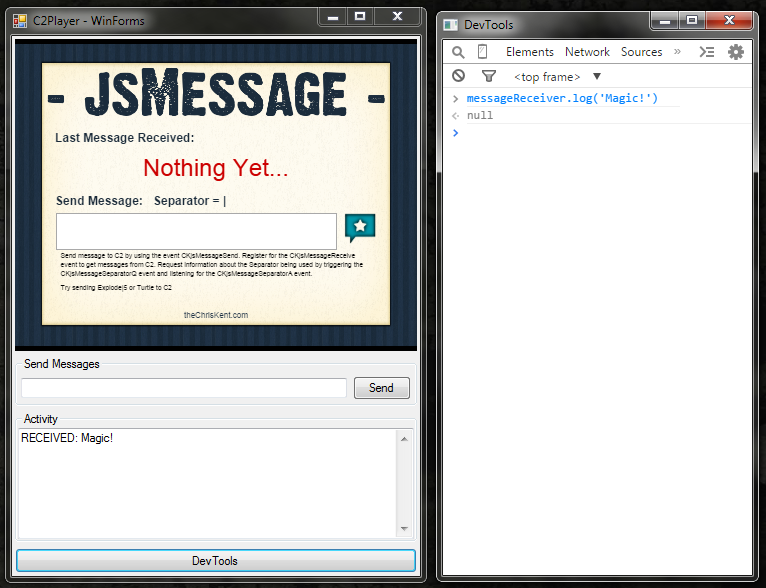
Go ahead and run the project and click the DevTools button. Switch to the console and start to type messageReceiver. You’ll find that Chrome’s autocomplete recognizes that there is a global messageReceiver object. If you call the messageReceiver.log function with a string you’ll see it show up in the Activity feed:
Now we just need to tell jQuery to call this function when receiving a message from the Construct 2 game. We do this by using the ExecuteScriptAsync method we used earlier when sending messages.
However, we have to make sure the game is loaded before we insert the event handler or it won’t take effect. We can do this by taking advantage of the browser’s IsLoadingChanged event. Add the following line to your Form constructor right after our RegisterJsObject call:
AddHandler browser.IsLoadingChanged, AddressOf onBrowserIsLoadingChanged
So now let’s add the onBrowserIsLoadingChanged sub to our Form code:
    Private Sub onBrowserIsLoadingChanged(sender As Object, e As CefSharp.IsLoadingChangedEventArgs)
        If e.IsLoading = False Then
            browser.ExecuteScriptAsync("$(document).on('CKjsMessageReceive',function(e,m){messageReceiver.log(m);});")
            RemoveHandler browser.IsLoadingChanged, AddressOf onBrowserIsLoadingChanged
        End If
    End Sub
The IsLoadingChanged event provides us with a helpful event argument that tells us if the Browser is loading or not. We verify that it is no longer loading then inject our JS event handler and remove the .NET event handler from the IsLoadingChanged event (since we only need to call this once).
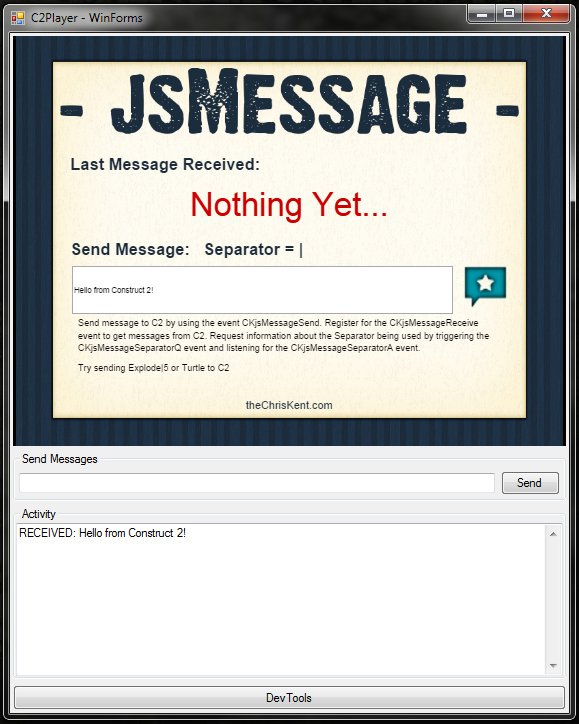
Run the application and type a message in the game textbox and click the jsMessage plugin icon (the turquoise speech bubble) and you’ll see that message come into the Activity feed:
You now have all the basic plumbing in place to host a Construct 2 game directly in your WinForms application and to be able to send and receive messages directly from the game! This opens up a wide range of possible applications. I wrote all of this for an integrated project I’m working on, but I hope you find it helpful too!