Applies To: SharePoint 2013, 2016, Office 365
List View Client Side Rendering Primer: 3 of 5
About This Series
This series provides a brief overview of Client Side Rendering for List Views (often referred to as JSLink). Basic extension points and examples are included. The goal of this series is to get developers unfamiliar with this programming model quickly up to speed.
- An Introduction to Client Side Rendering
- Benefits of Client Side Rendering
- Getting Started ⇐You Are Here
- List View Extension Points
- Client Side Rendering Best Practices
How to Get the Code
The example created using the steps in this series can be found in full as part of the csrShim repository:
https://github.com/thechriskent/csrShim/tree/master/Examples/CSR%20Primer
The full project can be found on GitHub:
https://github.com/thechriskent/csrShim
You can download or clone the repository directly from that site. You can also view the code directly on the site. csrShim is not used in this example and is not required.
In the following examples, we will be targeting on premise SharePoint 2013 using SharePoint Designer 2013.
List Setup
For this example, we will be using a custom list with just 3 columns:
- Title (Text)
- Person (User)
- Color (Choice)
To create the list:
- From a site where you have full control or design permissions, using the Site Actions menu (gear) choose Add an App
- Choose Custom List
- Name the list Hall of Fame and click Create
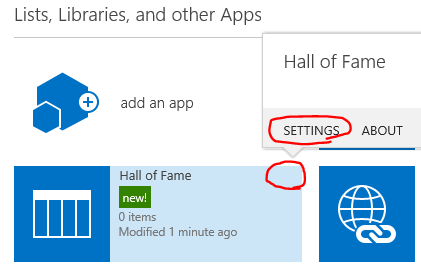
- From Site Contents, hover over the Hall of Fame icon and click the ellipsis to show the panel and choose Settings:
- Under Columns, click Create column
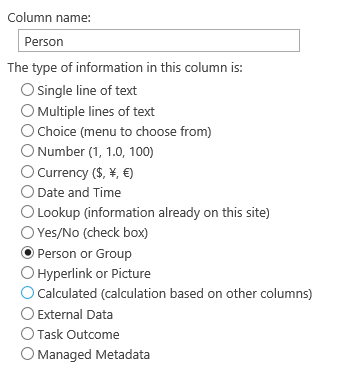
- Give a name of Person and set the type to Person or Group then click OK:
- Under Columns, click Create column again
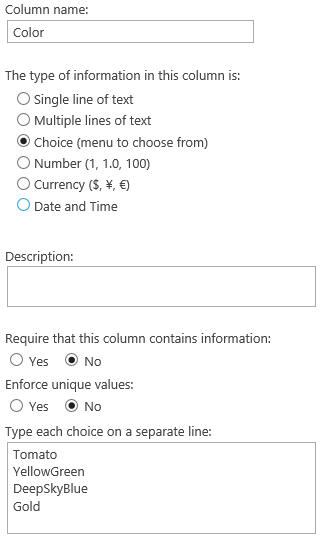
- Give a name of Color and set the type to Choice (menu to choose from). Replace the choices with Tomato, YellowGreen, DeepSkyBlue, Gold (each on separate lines):
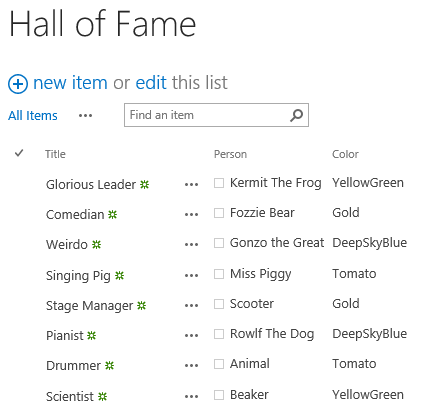
- Navigate to the Hall of Fame list and add several entries:
- On a page, choose to Edit and click the Add a Web Part button
- Under Apps, choose Hall of Fame
- Click Stop Editing
By default, you have a very OOTB view of the list as a table with column headers and not a lot of excitement. So, let’s customize it!
Script Setup
To use the JS Link property of the XSLTListView web part we added in the steps above (step 11), we’ll need a JavaScript file to point to.
- Open your site in SharePoint Designer
- Using the All Files navigation option, open a Document Library (generally, the Style Library is a great location for these types of resources)
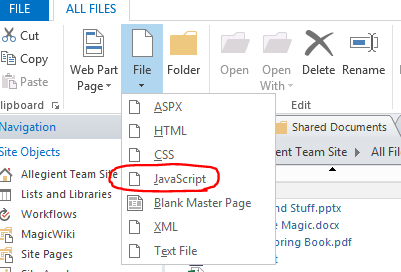
- In the File dropdown choose JavaScript:
- Name the file js
- Return to the page (in the browser) where you added the web part
- Edit the page and using the dropdown on the web part choose Edit Web Part
- In the web part tool pane, expand the Miscellaneous section
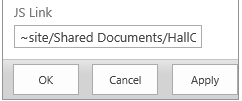
- In the JS Link box, Provide the path (You can use SPURLs) to the JavaScript file we created earlier then click OK:
- Nothing will happen (we haven’t provided any code yet). Click Stop Editing on the page
- Return to SharePoint Designer and Right-Click on the HallOfFame.js file and choose Edit File in Advanced Mode
- Enter the code from the CSR Boilerplate Code below
CSR Boilerplate Code
(function(){

    var HallOfFame = {
        BaseViewID: 1,
        ListTemplateType: 100
    };

    SP.SOD.executeFunc('clienttemplates.js','SPClientTemplates',function(){
        SPClientTemplates.TemplateManager.RegisterTemplateOverrides(HallOfFame);
    });

})()
The above code is simply boilerplate for the extension points we will fill in below. Here is what this code currently does:
- Line 1 is the declaration of an immediately invoked function expression (IFFE) that will ensure our code will not be placed in the global namespace. This convention should always be used with JS Link files.
- Lines 3-6 is the beginning of our template object. Soon we will be adding more properties to help determine how the list is formatted. For now, we’ve specified the BaseViewID and the ListTemplateType which is how we target the Custom List (type 100) so that SharePoint knows what data to provide us.
- Line 8 uses a Script On Demand (SOD) method to only call our function once the clienttemplates.js file has loaded and the SPClientTemplates object is ready to be used. This is essential to prevent our script from executing before SharePoint is ready.
- Line 9 registers our template object with the SharePoint CSR engine
Refreshing at this point will still not apply anything since we did not provide any Templates just yet.
Continue?
Everything is in place for us to provide some actual CSR templates, but in order to do so we need to understand what templates are even available and how to use them. So, check out the next post in this series:
