Applies to SharePoint 2013, 2016
Introduction
Standard Client Side Rendering (CSR) cannot be applied to Content by Query web parts (CQWP). However, using the open source csrShim stylesheet, CQWPs can also utilize JavaScript based rendering.
Content by Query Web Parts were heavily utilized in earlier versions of SharePoint but have fallen out of favor due to their complexity and limitations. However, they have proven to be performant options (in on premises deployments) that can continue to solve a variety of problems.
When used in appropriate situations, CQWPs can be very powerful assets. Unfortunately, the Out Of The Box (OOTB) limitation against CSR has made it inaccessible to newer developers. However, csrShim enables CSR for CQWPs using OOTB configurations and rendering tools.
This is not a comprehensive guide to using CQWPs or csrShim but provides the tools needed to bridge the gaps and enable CSR. For additional details about how to use csrShim see the csrShim Documentation on GitHub.
How to Get the Code
The example created using the steps in this document can be found in full as part of the csrShim repository:
https://github.com/thechriskent/csrShim/tree/master/Examples/CQWP
The full project can be found on GitHub:
https://github.com/thechriskent/csrShim
You can download or clone the repository directly from that site. You can also view the code directly on the site.
Background
Content by Query Web Parts
The Content by Query Web Part (CQWP), often just called the Content Query Web Part is part of SharePoint’s Enterprise Content Management (ECM) toolset. CQWPs aggregate list items across a site hierarchy while providing query optimization and caching.
Benefits
- Aggregation of list items across a single site collection
- Can aggregate items from a single list, multiple lists by list type or contenttype, and more
- Basic queries can be configured using OOTB web part tool pane
- Respects Audiences
- Powerful caching leading to high performance in on-premises deployments
- Is not subject to search’s limitations (use of managed properties, crawl delay, search language, etc.)
- OOTB display templates
Limitations
- Cannot cross site collections
- Advanced configuration can be difficult
- Custom display requires complicated XSL (unless using csrShim)
- Caching benefits are nullified when used in Office 365 leading to poor performance
- Does not have some of search’s benefits (pre-aggregated results, cross site collection, extreme scalability, etc.)
- Some fields (such as user fields) do not return as much detail as list view web parts
When to Use
You can use the CQWP when:
- You are using Audiences with list items
- Standard list views and APIs do NOT support audience filtering
- You are aggregating across lists/contenttypes and the search crawl delay is unacceptable (or the configuring of search schema is prohibited)
Don’t use the CQWP when:
- You need to cross site collections
- Targeting Office 365
- Search can be used instead
Standard Client Side Rendering
Client Side Rendering (CSR), often referred to as JSLink, is a technology introduced with SharePoint 2013 that provides extension points to use JavaScript to render SharePoint data. CSR continues to be supported in SharePoint 2016 and Office 365.
Additional information about how to use standard client side rendering with list views can be found in my earlier List View Client Side Rendering (JSLink) Primer series.
SharePoint does not support using standard CSR with CQWPs (No JS Link property is defined). However, csrShim exposes a parameter that will enable this functionality including the same set of event callbacks and templates described in the above guide.
csrShim
csrShim is an open source solution that fills the gap of many of the limitations presented by the OOTB client side rendering.
csrShim is an XSLT solution that can be used to:
csrShim is available through GitHub at:
https://github.com/thechriskent/csrShim
Getting Started
In the following examples, we will be targeting on premise SharePoint 2013 using SharePoint Designer 2013. We will be using a publishing site to have access to the Content by Query web part.
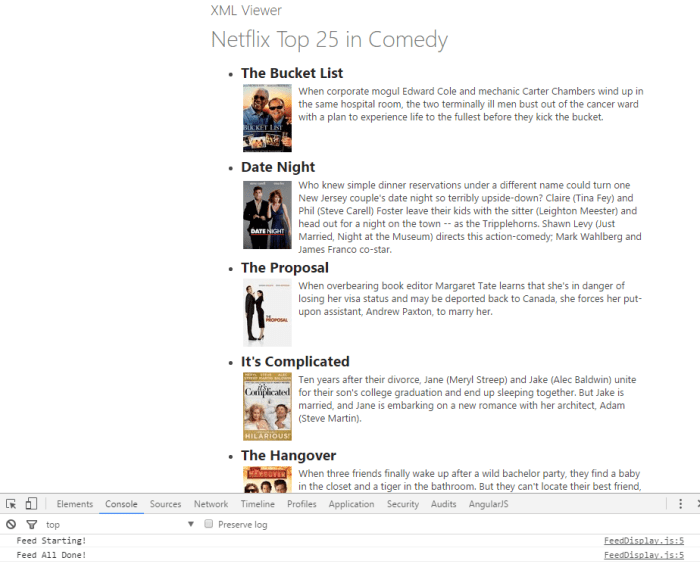
Additionally, we will be using the same list from the List View Client Side Rendering (JSLink) Primer series (with the exception that the Person field has a different Show field property). The CSR JavaScript file has also been adapted from the HallOfFame.js file created with that guide. Thus, many of the details around how CSR works are left out of this post. However, if you are already familiar with CSR basics you shouldn’t have any trouble following along.
The goal of this post, and this example, is not how CSR works but only how to use it with CQWPs.
List Setup
For this example, we will be using a custom list with just 3 columns:
- Title (Text)
- Person (User)
- Color (Choice)
A HallOfFame.xml PnP template with this list is available if you are familiar with how to apply PnP provisioning templates.
Otherwise, to manually create the list:
- From a site where you have full control or design permissions, using the Site Actions menu (gear) choose Add an App
- Choose Custom List
- Name the list Hall of Fame and click Create
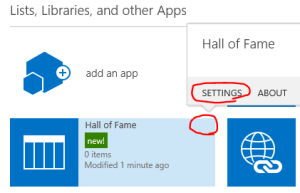
- From Site Contents, hover over the Hall of Fame icon and click the ellipsis to show the panel and choose Settings:
- Under Columns, click Create column
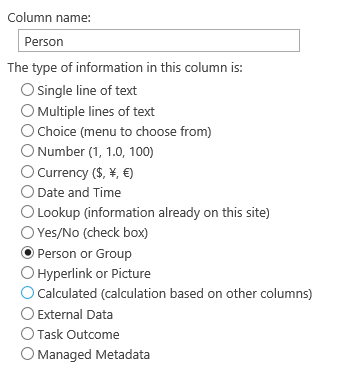
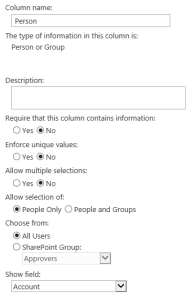
- Give a name of Person and set the type to Person or Group and set the Show field to Account then click OK:
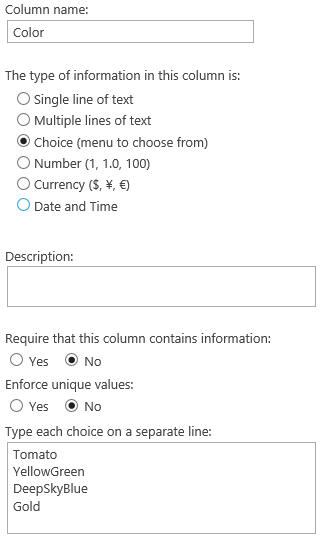
- Under Columns, click Create column again
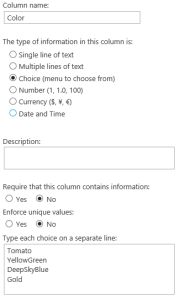
- Give a name of Color and set the type to Choice (menu to choose from). Replace the choices with Tomato, YellowGreen, DeepSkyBlue, Gold (each on separate lines):
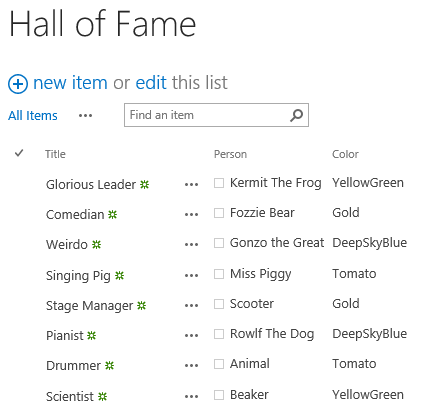
- Navigate to the Hall of Fame list and add several entries:
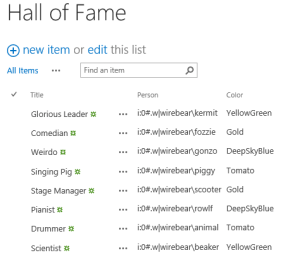
You now have a basic list and you could simply use standard CSR to display the contents if that’s all you wanted. For this example, we will only have the one list since our goal is to demonstrate how to use the CQWP with csrShim.
Generally, however, you might have multiple copies of this list across several subsites and you would use a CQWP to roll all the results up to a single view. In this scenario, standard CSR would be unavailable to you and is exactly where csrShim fills that gap.
Also, note that we specifically set the Person Field’s Show field property to Account. Unlike with list views, CQWPs get very little information from user fields. Most of the Show field options will return the user’s name (and nothing else). List views return many properties including ID, account, email, etc. So, we must choose carefully so that we retrieve additional information if needed (in this case the profile picture).
Script Setup
We will be using a modified version of the JSLink file created with the List View Client Side Rendering (JSLink) Primer series. This script is available at the sample code location mentioned in the introduction (HallOfFame.js).
A full description of each of the templates/functions was provided in the primer series and should be consulted for any questions. The primary differences between that version and this one are:
- The BaseViewID has been set to 40
- This isn’t strictly necessary but is recommended when using csrShim so that you know your JSLink is very specifically targeted and can therefore be hosted alongside standard CSR and other csrShim implementations without conflict
- The Item template was modified
- Since the CQWP doesn’t return a full user object, we can’t simply get the profile picture from the Person field. So, the photo is always set to the placeholder image and has its visibility set to hidden
- The user URL is also not set since we don’t have a user ID
- The PostRender callback was modified
- Code has been added to retrieve the PictureUrl and UserUrl from the User Profiles for each of the users based on their account name. Once those properties have been retrieved, the placeholder image is replaced (where appropriate) and visibility is set to visible. The href for the link is also set to the retrieved UserUrl.
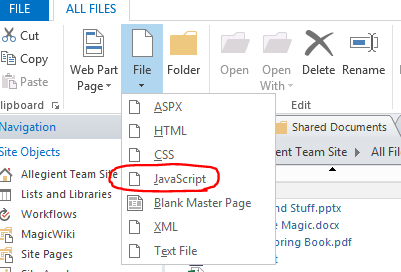
Upload the HallOfFame.js file to a library within your site (The Style Library of the root site of a site collection is a great spot!).
csrShim Setup
To use csrShim, a CQWP only needs 2 files:
Place these in a library within your site (The Style Library of the root site of a site collection is great spot for these!).
Configuring a CQWP to use csrShim
Adding a CQWP to a Page
On a web part page where you want to display your CQWP:
- Edit the page
- Click the Add a Web Part button in the zone where you wish your CQWP to end up
- Choose Content Query under Content Rollup (if you don’t have this option then the publishing features are not enabled)
- Using the web part dropdown, choose Edit Web Part to open the toolpane
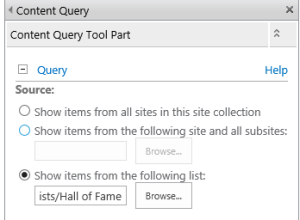
- Expand the Query section and select Show items from the following list then click Browse and locate the Hall Of Fame list created earlier:
- Again, this is a simple example (generally a single list CQWP view is not a great use case for a CQWP). However, any query that returns results with the CQWP (even complicated ones) can still take advantage of CSR display using csrShim.
- Click OK and choose to Stop Editing the page

You now have results on the page but only the Title field is showing and there is no custom display at all.
CQWP Configuration
Basic queries and sorting can be applied using the toolpane. However, you are fairly limited in how these results are displayed (including which fields are returned) and even in how complicated you can make your filters (query).
For all but the most basic CQWPs, you’ll likely end up manually editing the CQWP configuration either through SharePoint Designer or by exporting the definition, making your edits, and reimporting.
Since we used a web part page, we will simply use SharePoint Designer (SPD) to edit the configuration of the part directly. Other types of pages cannot always be edited in SharePoint Designer. In which case, you must apply the following changes into an exported web part definition file (XML). These changes are the same, but end up looking different from this example (You use property elements rather than setting the properties directly).
The easiest way to overcome this limitation is to use a web part page temporarily until your web part is properly configured using the below methods. Then export the web part from there and import into your other page types.
To edit the web part in SharePoint Designer:
- Connect to your site in SharePoint Designer
- In the navigation pane choose the library where you stored your page (if not listed, use the All Files node)
- Right-click on your page and choose Edit File in Advanced Mode
- SharePoint Designer often “helpfully” changes things that can cause problems. For instance, it is very common that it will escape double quotes within existing script blocks that should not be escaped. This will throw errors on your page.
- Look for the following:
<SharePoint:ScriptBlock runat="server">
var navBarHelpOverrideKey = "WSSEndUser";
</SharePoint:ScriptBlock>
- You will need to replace the “ values with actual double quotes (Again, this has nothing to do with this solution, this is just a common problem with SPD that may come up repeatedly):
<SharePoint:ScriptBlock runat="server">
var navBarHelpOverrideKey = “WSSEndUser”;
</SharePoint:ScriptBlock>
- Look for the following:
<SharePoint:ScriptBlock runat="server">
if(typeof(MSOLayout_MakeInvisibleIfEmpty) == "function")
{MSOLayout_MakeInvisibleIfEmpty();}</SharePoint:ScriptBlock>
- Again, you will need to replace the “ values with actual double quotes:
<SharePoint:ScriptBlock runat="server">
if(typeof(MSOLayout_MakeInvisibleIfEmpty) == “function”)
{MSOLayout_MakeInvisibleIfEmpty();}</SharePoint:ScriptBlock>
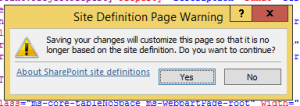
- Go ahead and save the page. In the Site Definition Page Warning dialog, click Yes:
Using csrShim
To use csrShim, you need to tell the CQWP to use the csrShim stylesheet. The CQWP uses 3 stylesheets (Main, Item, and Header). Unlike most web parts with a single XslLink property, the CQWP has one for each.
We will only use the Main, but you must provide a link for the Item and Header values or your web part will get an error. That is where the EmptyStyleSheet included with csrShim comes in handy.
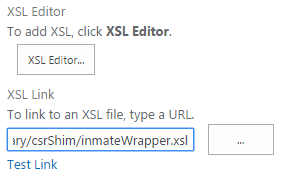
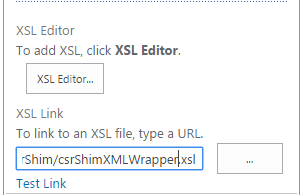
- Add the MainXslLink property directly to the ContentByQueryWebPart element on your page and give it the address of the xsl stylesheet
- Add the HeaderXslLink property directly to the ContentByQueryWebPart element on your page and give it the address of the xsl stylesheet
- Add the ItemXslLink property directly to the ContentByQueryWebPart element on your page and give it the address of the xsl stylesheet

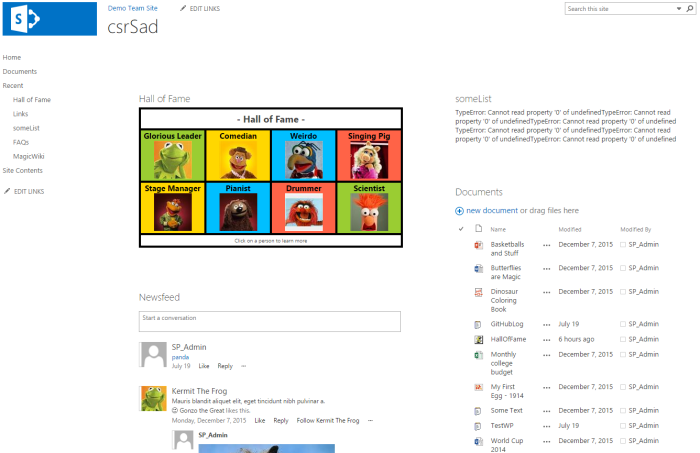
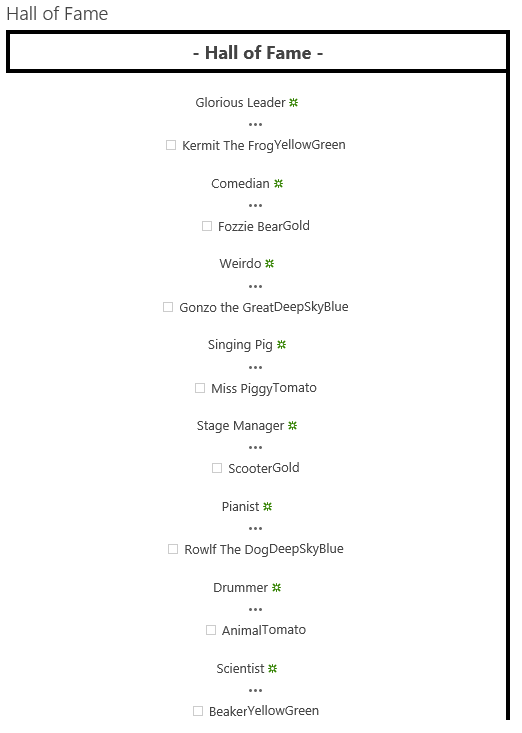
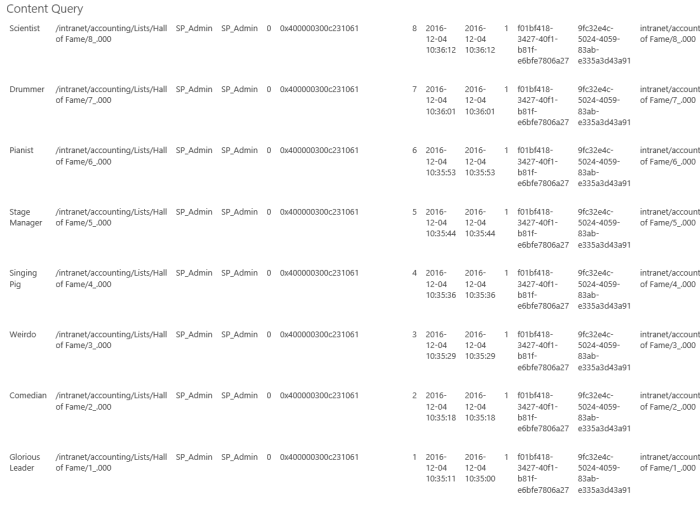
- Save the page in SPD and refresh it in the browser. You should now see many more fields in a strange display (this is the OOTB template-less CSR view)
Adjusting the Query
Now we’re getting somewhere! Clearly, this isn’t the display we’re going for just yet but csrShim is in place and ready to have a JS Link file applied.
First, however, it’s a good idea to get your query adjusted before introducing the complication of custom rendering. Often, you’ll accomplish this by using the QueryOverride attribute with your own CAML. For this example, we want to return all the items but we want it sorted in order of creation, ascending. For simple sort changes, we’ll just use existing properties (we could have done this in the toolpane as well).
- By default, the SortBy attribute should already be set to Created. The SortByDirection is set to Desc by default. Change this to Asc and Save the page in SPD.
Additional Fields
If you look through the many fields that are returning on the page, you’ll notice that the Person and Color fields are missing. You can request additional fields using the CommonViewFields property:
- Add the CommonViewFields property directly to the ContentByQueryWebPart element on your page and give it the value of Title,Text;Person,User;Color,Text;

- Save the page in SPD
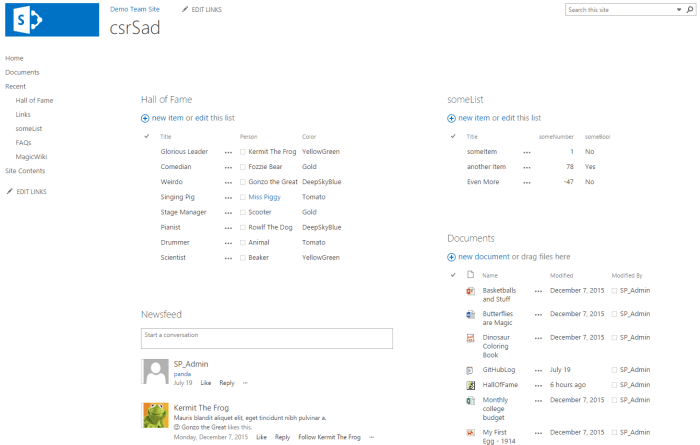
Refreshing the page in the browser will show that the values for these columns are now showing up, yay!
A Note about Field Types
Although there is a Choice option for the type (the text following the comma after the internal name), Text always works and Choice only sometimes. In the sample’s case, either is fine, but a multi-choice column will cause your CQWP to not return any data if Choice is used but will work fine with Text. Therefore, it is recommended to always use Text for Choice columns.
Other types that can be used:
- Text
- Note
- Number
- Currency
- Integer
- Boolean
- DateTime
- Threading
- Lookup
- Choice
- URL
- Counter
- DisplayOnly
- RichHTML
- Image
Applying Client Side Rendering
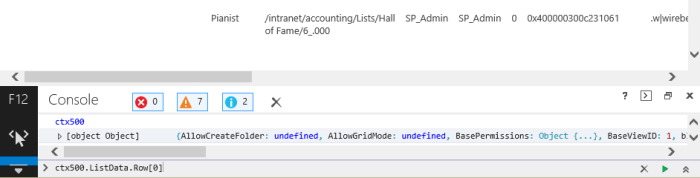
Technically, we’ve already applied client side rendering simply by using csrShim as the stylesheet. If you check using your development tools, you’ll find a ContextInfo object in the global namespace (likely ctx500).
Now to apply our JS Link file to the CQWP!
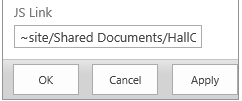
With list views, you can simply open the toolpane and put your script reference(s) in the JS Link property of the XSLTListView web part. There is no JS Link property on the CQWP. Instead, csrShim exposes several parameters including a JSLink parameter where we can specify these. This is done through the CQWPs ParameterBindings element.
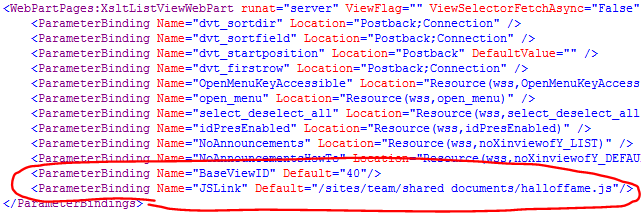
- Add a ParameterBindings Add a ParameterBinding element with a Name of BaseViewID and a Default value of 40. Add another ParameterBinding element with a Name attribute of JSLink and a Default value of the address to the HallOfFame.js file we uploaded earlier.
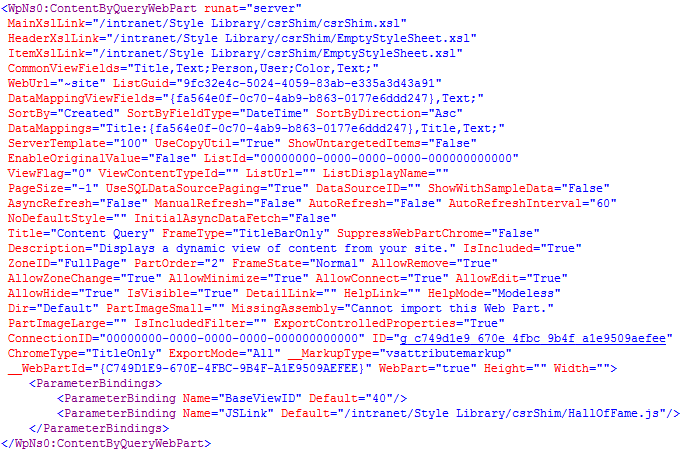
<ParameterBindings>
  <ParameterBinding Name="BaseViewID" Default="40"/>
  <ParameterBinding Name="JSLink" Default="/Intranet/Style Library/csrShim/HallOfFame.js"/>
</ParameterBindings>
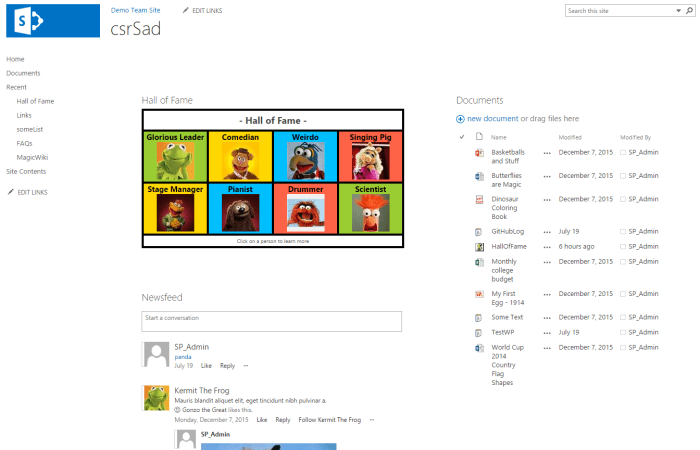
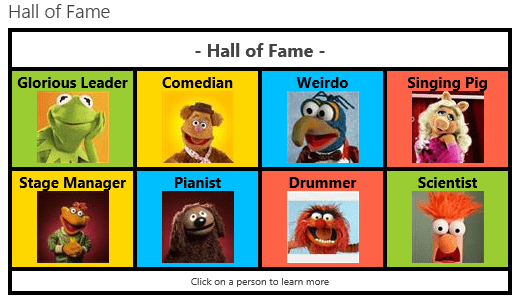
If you refresh the page, you’ll see the glory that is CSR with a CQWP!

Best Practices for csrShim with CQWPs
- Set the XslLink for ALL 3 CQWP properties
- MainXslLink = address of csrShim.xsl
- ItemXslLink = address of EmptyStyleSheet.xsl
- HeaderXslLink = address of EmptyStyleSheet.xsl
- Use the CommonViewFields property of the CQWP to include additional fields
- Use Text for Choice fields in the type portion of the CommonViewFields property
- If fields are coming back as GUIDs instead of their internal name, use the DataMappings property of the CQWP
- Provide a unique BaseViewID to prevent conflicts with the default value of 1 (standard CSR with list views uses this value)
- If reusing JSLink files between CQWPs, list views, and/or feeds, use the ctx.ShimType property to create conditional property retrieval as needed