Applies To: Construct 2, jQuery, jsMessage
In my last post, Introducing jsMessage for Construct 2, I gave a brief overview of my C2 Plugin jsMessage. jsMessage enables sending and receiving messages in Construct 2 through jQuery events. You can read more in that post, but the basic idea is the ability to communicate to a Construct 2 game through the Browser. The license is free for everybody and attribution isn’t required.
In this post, I’m going to walk through the jsMessageTest Basic game to show you exactly how it works. You can also download it over on CodePlex if you’d like to follow along.
“Game” Overview
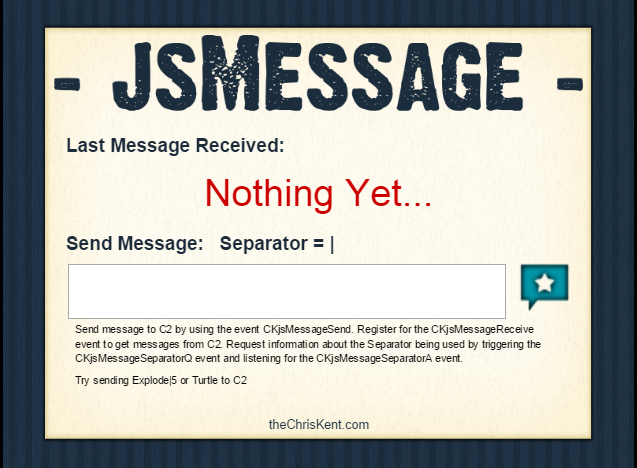
When you first run the project not much is going to happen. You’ll see a big red message that says “Nothing Yet…” – once you’ve successfully sent a message the contents will be displayed here.
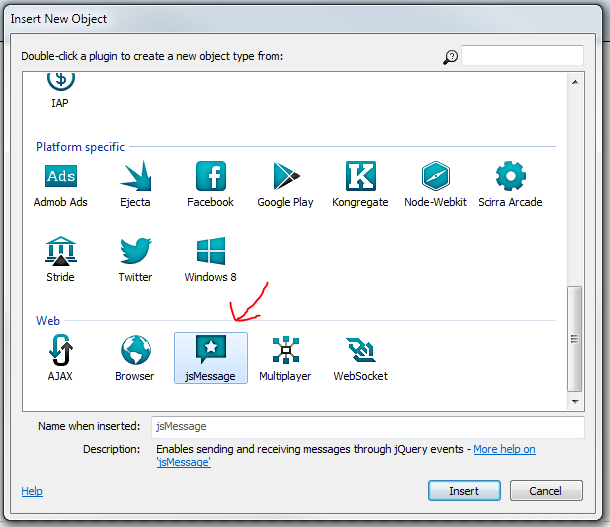
This is a very simple game project with just a few assets and only a small set of standard objects (Touch, Sprite, Browser, Particles, Text and Text Box). The only custom object is the jsMessage object. This was added to the project like any other object and can be found in the Web section (assuming you’ve installed it):
Receiving Messages in Construct 2
The Event Sheet
jsMessage provides 2 conditions for receiving messages. The first one, Message Received, fires every time a message is received. In our game we are using it to set the text of the txtRecevied object (the big red text). We are also outputting additional information to the console. This helps illustrate several of jsMessage’s expressions but is not something you’d normally do outside of debugging. Here’s what this section of the Event Sheet looks like:
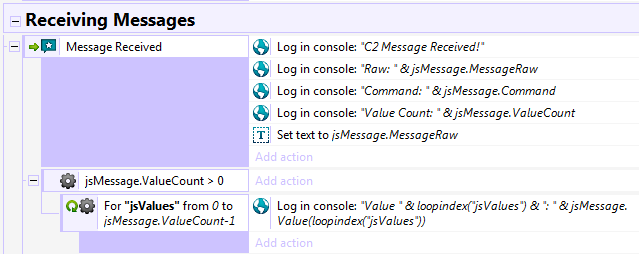
Using the Log in console action of the built-in Browser object, we output information about the received message. The jsMessage.MessageRaw expression provides the full message string. The jsMessage.Command expression provides only the first part of the message before any values (known as the command). The jsMessage.ValueCount provides the total count of values passed (additional strings after the command separated by the Value Separator Property).
Finally, there’s a For Loop that outputs each of the message’s values (if there were any) by using the jsMessage.Value() expression.
Client-Side
Let’s give it a go. For all of the client-side examples we’re just going to type the jQuery commands directly into the console. So go ahead and run the project and open the Dev Tools (Just hit F-12 in Chrome) and switch to the console. Type the following:
$(document).trigger('CKjsMessageSend','Hello World');
Once you hit enter, your screen should look like this:
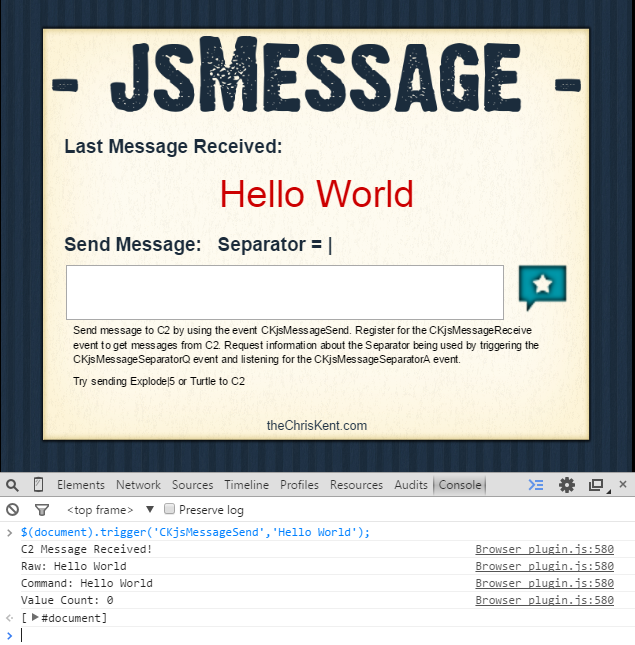
You can see the txtReceived object had its text set to the message and the console has all the log messages we expected (Raw & Command are equal in this case and the Value Count is 0).
Now try sending this:
$(document).trigger('CKjsMessageSend','DoThing|Turds|Sunshine');
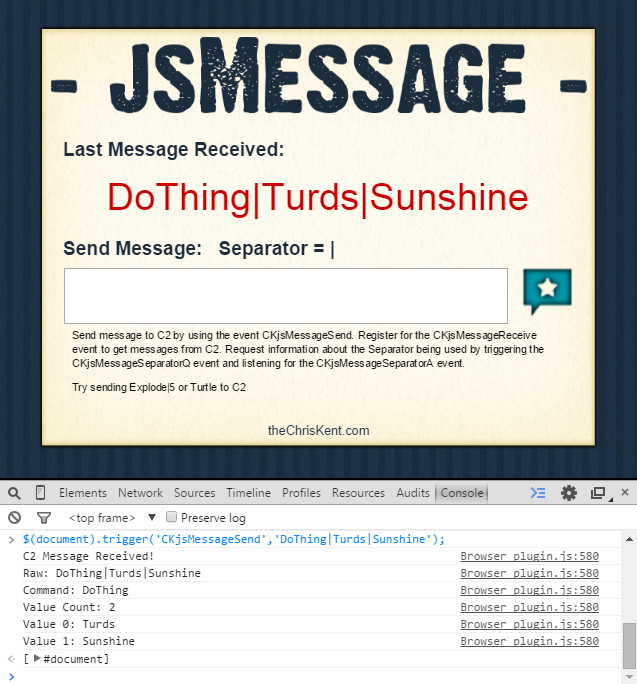
You’ll see the txtReceived object gets the full message just like before, but if you look in the console you’ll see some differences. We can now see our Command is DoThing and that we have 2 values: Value 0 is Turds and Value 1 is Sunshine. Of course, we are assuming the use of the default separator (The separator is customizable so it’s always a good idea to use the Separator Events to determine what that is before sending/receiving messages on the client).
Responding to Commands in Construct 2
The Event Sheet
Another condition provided by jsMessage is Command Received. This condition lets you specify the command to listen for. This is what we’re doing in the Turtle section of the Event Sheet:
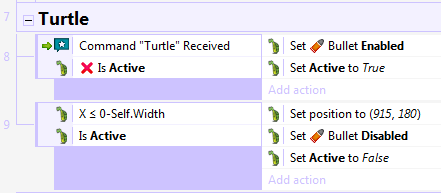

We are listening for the command, “Turtle”. When it’s received we move a turtle sprite across the screen using a Bullet behavior (There are also a couple of conditions to reset the turtle once it leaves the screen).
Client-Side
Here’s how we trigger this command from the console:
$(document).trigger('CKjsMessageSend','Turtle');
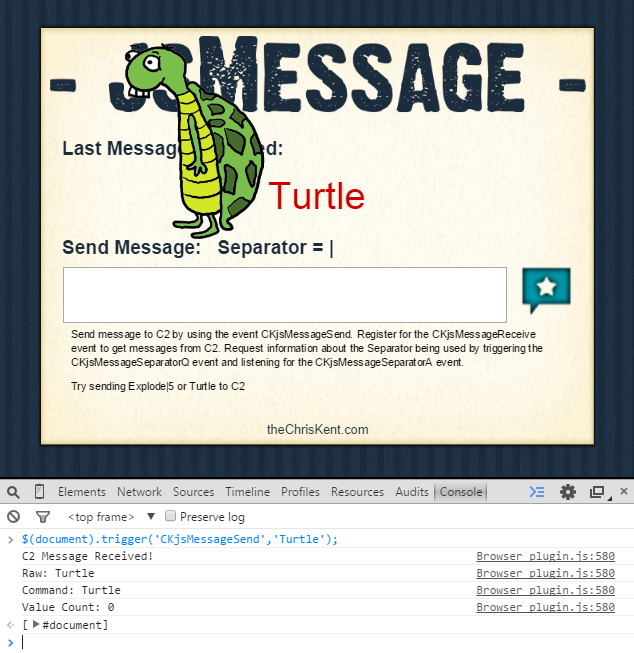
Look at that cute turtle! LOOK AT IT!
You can see everything works just like any standard condition (Note that the console also provides us all the extra information because both the Command “Turtle” Received and Message Received conditions are firing).
Responding to Commands with Values in Construct 2
The Event Sheet
Commands are just messages which means they can also have attached values. This can be seen in the Explosions section of the Event Sheet:
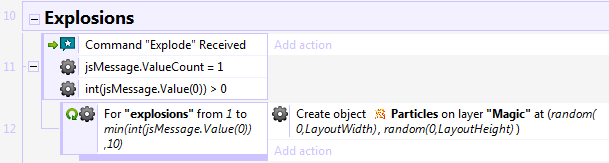
We are listening for the command, “Explode”, but we’ve added some additional conditions to ensure that there is an included value (jsMessage.ValueCount = 1) and that that value is an integer greater than 0 (int(jsMessage.Value(0)) > 0).
Once the above conditions are met,we use a For Loop to create the number of explosions (particle objects) as specified by the passed value (with a max of 10 cause let’s not get crazy!).
Client-Side
Here’s how we trigger this command from the console:
$(document).trigger('CKjsMessageSend','Explode|7');
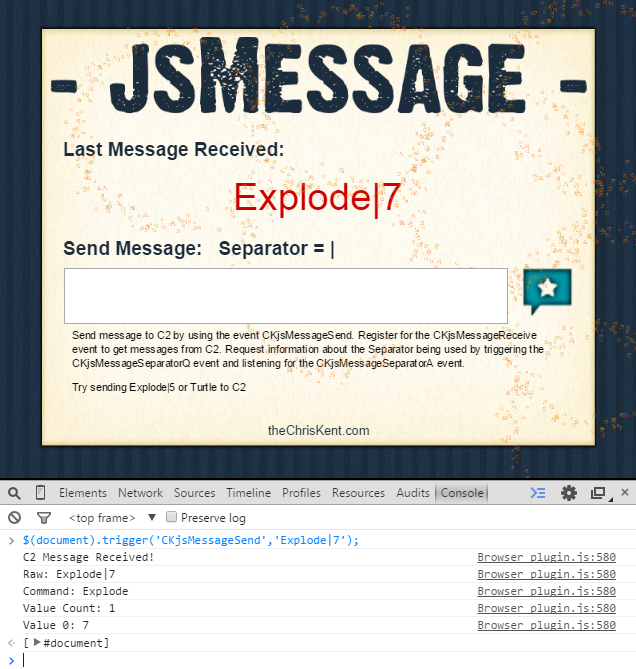
GLORIOUS EXPLOSIONS!
Sending Messages from Construct 2
The Event Sheet
jsMessage provides a single Action, Send Message, that is really easy to use. You just provide the message as a parameter and it’ll take care of it:

All we’re doing above is treating the icon sprite like a button by responding to a tap (or click). We flash the button to give some feedback to the user that they tapped it and then call the Send Message action with the text of the txtboxSend object. Of course, nothing is going to happen if nobody is listening on the other side…
Client-Side
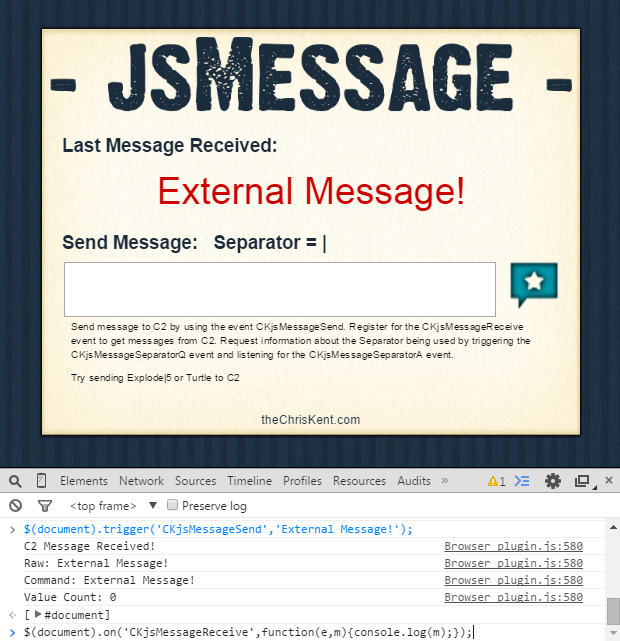
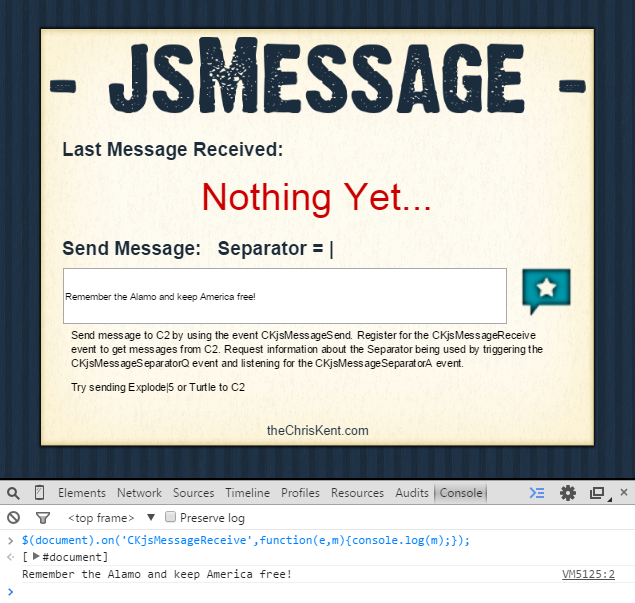
To receive messages from Construct 2 you will need to register to respond to the appropriate jQuery event. Here’s an extremely simple response that just writes the sent message out to the console:
$(document).on('CKjsMessageReceive',function(e,m){console.log(m);});
To test, just write something in the text box and click the button:
Sending Messages with Values from Construct 2
The Event Sheet
To send messages with values from your game you’ll build your messages using the same format as above. You can see an example of this in the Responding to Requests section of the Event Sheet:

When we get the command, “FPS?”, we use the Send Message action to send a custom message built by concatenating a command, “FPS”, the separator using the jsMessage.Separator expression and the C2 value, fps. We could have just typed the default separator but since this is a customizable property it’s always better to use the jsMessage.Separator expression.
Client-Side
To test this one, we need a slightly more elaborate response function:
$(document).on('CKjsMessageReceive',function(e,m){console.log('Client-Side Message Received!');var parts=m.split('|');console.log('Command Received: '+parts[0]);for(var v=1; v<parts.length;v++){console.log('Value Received: '+parts[v]);}});
I’ve kept it to one line above so that it can be easily pasted in the console, but here’s what it looks like where it’s a little more readable:
$(document).on('CKjsMessageReceive',function(e,m){
    console.log('Client-Side Message Received!');
    var parts = m.split('|');
    console.log('Command Received: ' + parts[0]);
    for(var v = 1; v < parts.length; v++){
        console.log('Value Received: ' + parts[v]);
    }
});
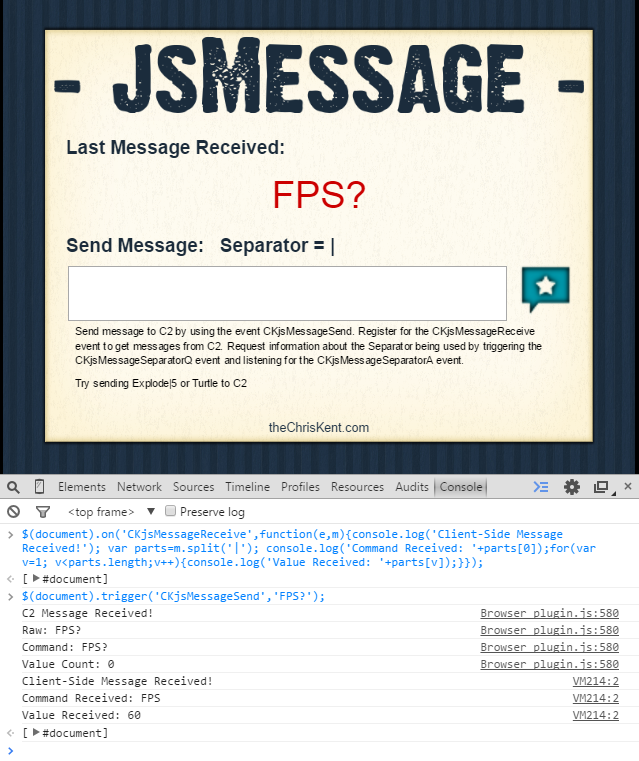 When we send the “FPS?” message to the game it responds with the fps information. Our client-side response just outputs the C2 message right back to the console. I’ve hard-coded the default separator in this example, but you’ll want to use the Separator Events beforehand to ensure you know what the separator is before receiving/sending messages from the client.
Be sure to check out the full documentation for more details. Stay tuned for an upcoming post where I’ll show you an actual use case for this plugin. WOWEE!