Multi-Level Top Link Bar Navigation (Sub Menus)

Applies To: SharePoint 2010

The Top Link Bar (sometimes called the Tab Bar) allows you to include a mix of links and headers (with child links). By default, this results in a single sub menu and handles most situations well.

IMG_0347

However, the need to have multiple levels (additional sub menus) often comes up. There are several solutions out there that suggest replacing the Top Navigation Menu control altogether using javascript or CSS menus. These work but are also totally unnecessary. The Top Link Bar uses a standard ASP.NET menu control and comes with several attributes that can be customized.

In the v4.master (SharePoint 2010) the section we’re interested in can be found inside the PlaceHolderTopNavBar ContentPlaceHolder (Specifically the SharePoint:AspMenu control TopNavigationMenuV4):

					<asp:ContentPlaceHolder id="PlaceHolderTopNavBar" runat="server">
					<h2 class="ms-hidden">
					<SharePoint:EncodedLiteral runat="server" text="<%$Resources:wss,topnav_pagetitle%>" EncodeMethod="HtmlEncode"/></h2>
							<asp:ContentPlaceHolder id="PlaceHolderHorizontalNav" runat="server">
<SharePoint:AspMenu
  ID="TopNavigationMenuV4"
  Runat="server"
  EnableViewState="false"
  DataSourceID="topSiteMap"
  AccessKey="<%$Resources:wss,navigation_accesskey%>"
  UseSimpleRendering="true"
  UseSeparateCss="false"
  Orientation="Horizontal"
  StaticDisplayLevels="2"
  MaximumDynamicDisplayLevels="1"
  SkipLinkText=""
  CssClass="s4-tn"/>
<SharePoint:DelegateControl runat="server" ControlId="TopNavigationDataSource" Id="topNavigationDelegate">
	<Template_Controls>
		<asp:SiteMapDataSource
		  ShowStartingNode="False"
		  SiteMapProvider="SPNavigationProvider"
		  id="topSiteMap"
		  runat="server"
		  StartingNodeUrl="sid:1002"/>
	</Template_Controls>
</SharePoint:DelegateControl>
							</asp:ContentPlaceHolder>
					</asp:ContentPlaceHolder>

The key attribute can be found on line 355 above. The MaximumDynamicDisplayLevels defaults to 1. Setting this to 2 or higher will control how many levels of sub menus you want to allow. Once you’ve made this change to your Master Page (saved, checked-in, and approved), SharePoint will be able to display multiple sub menus!

Unfortunately, the navigation settings found in Site Actions > Site Settings > Navigation (under Look and Feel) only allow top level Header entries and won’t display or allow you to edit navigation nodes at levels greater than 2:

NavigationSettingsArrgg

So even though we made the correct change to the control we have no native way to edit these sub menus. Fortunately this can be done with PowerShell (Or just plain .NET) which will be the subject of the next post. However, this is a necessary first step towards Multi-Level Top Bar Links.

Links List with Favicons and Under the QuickLaunch

Applies To: SharePoint

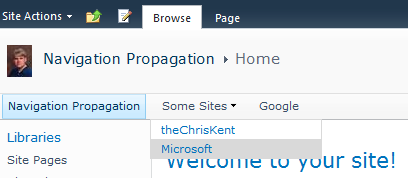
SharePoint has a handy list called Links that makes putting together a list of links with a display name pretty simple. Since it’s a normal list you can use views or even XSLT to make it look nice wherever you display it on the page. By default, here’s what a small links list looks like using the Summary View:

It’s not too bad, especially for a simple team site. But with just a little extra work you can have that same list of links display with their favicons and you can move them to some relatively unused real estate – under the QuickLaunch, and on every page in your site.

I’m combining these techniques because that was what I did. Fortunately, you can use the bulk of my tips to get nearly any web part to show up below the QuickLaunch. You can also just use the Favicon information to make your link display snazzy. Also, although I’m demonstrating all of this in SharePoint 2010, you should be able to do everything in SharePoint 2007 as well.

Displaying a Web Part Beneath the QuickLaunch

In order to place a Web Part below the QuickLaunch, you’re going to have to edit the Master Page. There are a couple of options. You can add a Web Part Zone and then customize this area on a page by page basis, or you can do what I’m going to demonstrate: add a specific web part to every page on your site.

Open your site in SharePoint Designer (Site Actions -> Edit in SharePoint Designer). Choose Master Pages in the Navigation pane and right-click on v4.master and choose Copy then right-click and choose Paste. Right-click on the new Master Page, v4_copy(1).master, and choose Rename. Once you’ve renamed it, right-click on it and select Edit File in Advanced Mode:

Depending on your site’s settings, you might have to check it out. If so, make sure you check it back in when done and verify you’ve published a major version so that those without full control can see your changes.

We’re going to place our web part right below the quicklaunch. So scroll down to approximately line 594 (in Code view) where you should see two closing divs shortly below the PlaceHolderQuickLaunchBottomV4 UIVersionedContent control. If you want your web part to be included in the leftpanel then press enter after the closing div in line 592, if you want it placed below the box press enter after the closing div in line 594:

Type <br /> and press enter again. Press Save. You’ll get a warning about customizing the page, go ahead and click Yes.

Now switch to the Insert ribbon and select Web Part > Content Query:

Switch to the Design view and right-click on your new web part and choose Web Part Properties. In the dialog window expand the Query section. Choose Show items from the following list under Source and click Browse… and choose your Links list.

Expand the Presentation section. Set Sort items by to <None> (This is to ensure the custom ordering allowed by Links lists is used). Uncheck the Limit the number of items to display checkbox.

In the Fields to display section enter Url [Custom Columns]; for the Link and remove the Title entry:

Choose any other display options you want (I expanded Apperance and chose Chrome Type: None). Press OK to close the dialog. Save the master page. In the navigation pane on the left, right-click on your master page and choose Set as Default Master Page:

Now when you refresh your site you should see the changes (Be sure to publish a major version and/or check in the file if required to ensure everyone can see it):

Adding Favicons to the Links

The above screenshot is pretty cool. Unfortunately, instead of using the display text, it just uses the link. It also doesn’t open the links in a new window. We’ll fix these issues and add a favicon using some simple XSL.

I found the basic XSL to fix the Links display on Marc D Anderson’s blog who apparently got it from this Microsoft forum thread. We’re going to straight up copy that XSL and tweak it just a little to add our favicons. Here’s our customized XSL:

<xsl:template name="LinkList" match="Row[@Style='LinkList']" mode="itemstyle">
	<xsl:variable name="SafeLinkUrl">
		<xsl:call-template name="OuterTemplate.GetSafeLink">
			<xsl:with-param name="UrlColumnName" select="@URL"/>
		</xsl:call-template>
	</xsl:variable>
	<xsl:variable name="DisplayTitle">
		<xsl:call-template name="OuterTemplate.GetTitle">
			<xsl:with-param name="Title" select="@URL"/>
			<xsl:with-param name="UrlColumnName" select="'LinkUrl'"/>
		</xsl:call-template>
	</xsl:variable>
	<xsl:variable name="TheLink">
		<xsl:value-of select="substring-before($DisplayTitle,',')"/>
	</xsl:variable>
	<div id="linkitem" class="item link-item" style="padding-left:10px;">
		<xsl:call-template name="OuterTemplate.CallPresenceStatusIconTemplate"/>
		<img src="http://www.google.com/s2/favicons?domain_url={$TheLink}" align="middle" style="padding-right:2px;" />
		<a href="{$TheLink}" target="_blank" title="This link opens in a new window">
			<xsl:value-of select="substring-after($DisplayTitle,',')"/>
		</a>
	</div>
</xsl:template>

The main changes I made were the additional padding added to the div in line 16 to get everything to line up with the QuickLaunch links and the img element in line 18.

The img element uses a special link from Google (found on the Coding Clues blog) concatenated with our link’s URL. This link allows us to dynamically retrieve the favicons without having to store them within SharePoint or maintain them as links get added or changed.

So where do we put the above XSL? In your site collection’s Style Library there is a folder called XSL Style Sheets. Open the ItemStyle.xsl file and scroll all the way to the bottom. Just before the final node, </xsl:stylesheet>, paste the above XSL. Since this is just a named template, this won’t affect anything else within your site collection. Upload the changed ItemStyle to the XSL Style Sheets folder and make sure to Publish a major version of the file so everyone can see it:

Now we need to tell our Links Content Query web part to use this item style. So, back in SharePoint Designer, right-click on your Content Query web part and choose Properties. Scroll down to ItemStyle and change it from Default to LinkList:

Save the master page and refresh your site and you should see something similar to this:

Isn’t that pretty!? Now everyone loves you!

Hide “All Site Content” Link Based on Permission

Applies To: SharePoint

By default in SharePoint 2010 nearly every visitor to your site automatically gets an “All Site Content” link added to their quick launch. In addition, there’s a “View All Site Content” option in the Site Actions menu. Here’s a default team site as seen by a user with only Read permission:

For team sites and basic work areas this is a great idea. However, there are several cases where it would be better if this wasn’t shown to the average user – for instance, a Business Intelligence Center. A Business Intelligence Center site is where you’re probably hosting PerformancePoint content and/or reports, etc. Anyone using your dashboards must have read permission to all the content and datasources. But generally you don’t want general users browsing this content. It’s better to provide good navigation either through the quicklaunch or a nice home page. However, you want your designers to still have this link.

Fortunately, Microsoft built the quicklaunch link with a ClusteredSPLinkButton and the Site Actions link with a MenuItemTemplate both of which have the PermissionMode and PermissionsString properties. These controls allow you to perform simple permission trimming.

SPSecurityTrimmedControl Permission Trimming

The controls both inherit from SPSecurityTrimmedControl which is where the permission trimming properties and methods come from.

The first property, PermissionsString, defines the permission(s) a user must have in order to view the control. You can find a list of permissions here. By default both of the All Site Content link controls use the ViewFormPages permission (Basically, anyone who can get to the site).

You can use multiple permissions in your PermissionsString by separating them with a comma. How those are used is determined by the PermissionMode property which can have two values: Any or All. When set to “Any” the control will show if a user has at least one of the permissions in your PermissionString. When set to “All” the control will only show if a user has every permission listed in your PermissionString.

We wanted the All Site Content links to only show for users with Full Control over a site. So our PermissionsString needs to be ManageWeb, and since we’re only using one permission our PermissionMode can be either Any or All or even not included.

Hiding the Quicklaunch Link

To change the permission trimming attributes for our controls, we have to edit the MasterPage. If you’re developing a custom branding solution then this should be easy enough to do directly in Visual Studio. If you’re just customizing on the fly, then you’ll use SharePoint Designer (Choose Edit in SharePoint Designer from the Site Actions menu).

In the default master page (v4.master) the Quicklaunch All Site Content link can be found around line 573 and is included in the PlaceHolderQuickLaunchBottomV4 UIVersionedContent control. Here’s what it looks like by default:

<SharePoint:ClusteredSPLinkButton
	id="idNavLinkViewAllV4"
	runat="server"
	PermissionsString="ViewFormPages"
	NavigateUrl="~site/_layouts/viewlsts.aspx"
	ImageClass="s4-specialNavIcon"
	ImageUrl="/_layouts/images/fgimg.png"
	ImageWidth=16
	ImageHeight=16
	OffsetX=0
	OffsetY=0
	Text="<%$Resources:wss,quiklnch_allcontent_short%>"
	accesskey="<%$Resources:wss,quiklnch_allcontent_AK%>"/>

So all we have to do is change line 576 to read PermissionsString=”ManageWeb” and save.

Hiding the Site Actions Link

The Site Actions menu is just as easy to edit. The View All Site Content link can be found around line 137 inside the SiteActions FeatureMenuTemplate control. Here’s what it looks like by default:

<SharePoint:MenuItemTemplate runat="server" id="MenuItem_ViewAllSiteContents"
	Text="<%$Resources:wss,quiklnch_allcontent%>"
	Description="<%$Resources:wss,siteactions_allcontentdescription%>"
	ImageUrl="/_layouts/images/allcontent32.png"
	MenuGroupId="300"
	Sequence="302"
	UseShortId="true"
	ClientOnClickNavigateUrl="~site/_layouts/viewlsts.aspx"
	PermissionsString="ViewFormPages"
	PermissionMode="Any" />

Again, just change line 145 to PermissionsString=”ManageWeb” and save.

That’s it! Here’s what the same Team Site now looks like to a user with Read permission:

Hiding the Recently Modified Section in SharePoint 2010

Applies To: SharePoint 2010, CSS

I recently added a Wiki Pages Library to a site for some end users and they really like it. However, they had a seemingly straight forward request to hide the Recently Modified section that was showing up above the Quick Launch:

This may come up as a requirement when using some of the default templates that automatically include a Site Pages library or if a user adds a new page and is prompted to create the Site Pages library automatically.

I assumed there was a setting somewhere either for the library or the site in order to turn off this “feature”. Nope. Somebody decided that this was not only a feature everyone would want, but it was so great they put it in the left actions content place holder (PlaceHolderLeftActions) of the master page – which puts it on top of the quick launch.

Some quick searching turned up “solutions” that suggested setting the contentplaceholder’s visible property to false within the master page. This works; however, it also hides anything that uses that contentplaceholder such as some of the Blog tools. This makes it a very poor candidate for a farm wide branding solution.

The other option is to use some CSS (cascading style sheets). If you’re pushing this as part of a branding solution, just add this to one of your style sheets:

.s4-recentchanges{
	display:none;
}

That’s it. Microsoft provided a very handy class just for this section and some quick use of the CSS Display property takes care of it.

So what if this is just a one off thing – You aren’t currently using any custom branding or just want it to affect one site? For a single site you can use SharePoint Designer 2010 to open the master page (v4.master – choose edit in advanced mode). Then somewhere on the page add the following:

<style>
.s4-recentchanges{
	display:none;
}
</style>

If you just want to apply it page by page, you can put the style directly in the HTML of the page. Since this is a Wiki page, choose to edit the page (Under the Page Ribbon assuming you have the rights). Click anywhere on the page and choose the HTML drop down and pick Edit HTML Source:

Somewhere on the page add the following:

<style>
.s4-recentchanges{
	display:none;
}
</style>
You can also do this in a content editor web part using the same Edit HTML Source option.

If you don’t hide this thing, I would suggest editing the master page to at least move that contentplaceholder below the quicklaunch so your navigation doesn’t get all wonky or at least displaced by a relatively unused feature.