Column Formatting Client-Side Web Part: Column Formatter

Applies To: Office 365

Update

This solution is now officially a part of SharePoint PnP! Please use this repo for all updates, issues, contributions, and more. Whoo Whoo!


Modern listviews support the addition of custom formatting for most field types. This is an awesome feature designed to make custom formatting simpler and less administratively difficult than packaged solutions.

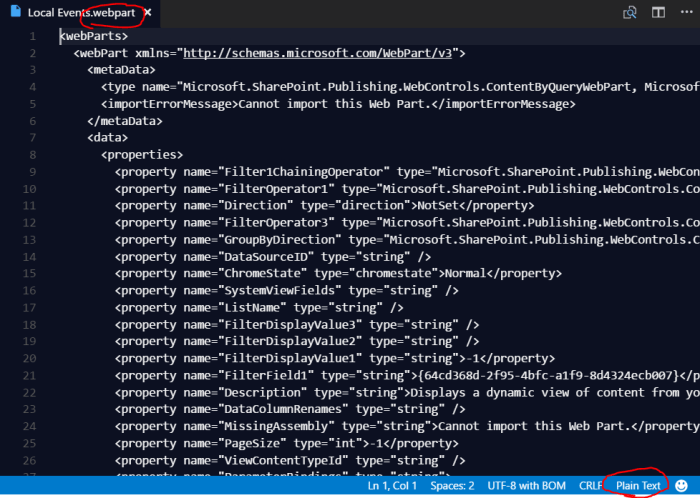
Unfortunately, the tooling is still very minimal. Users are given a simple text field within a panel to paste the JSON code and a preview and save button. The panel is clearly not designed to enable editing meaning that not only do users have to write code, they have to find someplace to do it.

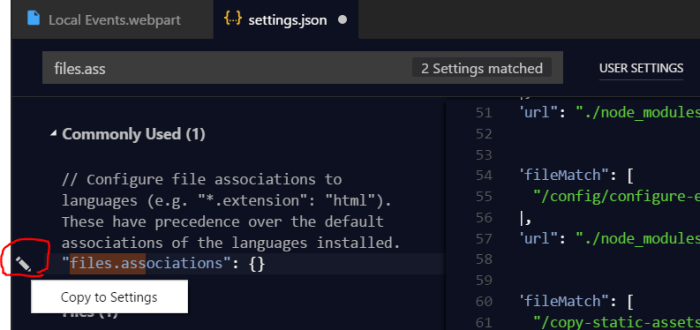
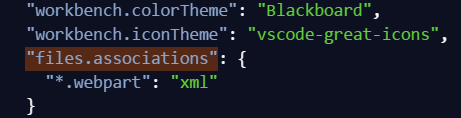
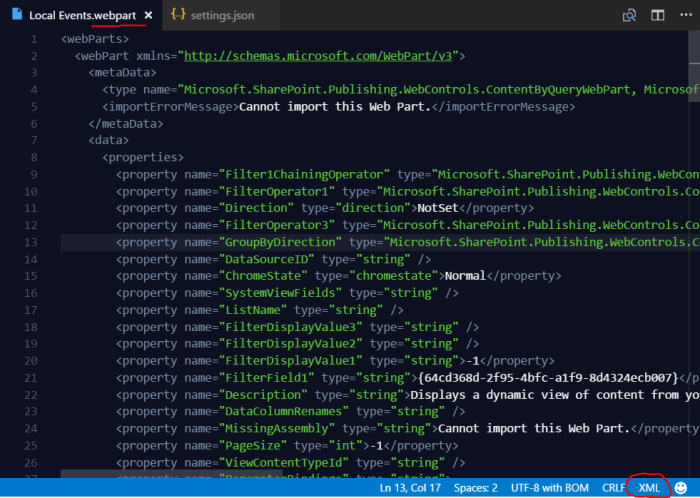
The official suggestion is to use VS Code which will provide some auto completion using the standard schema. However, there are several downsides to this approach:

  • Requires a desktop client to be installed
    • Non developers that may have hung on past the initial mention of JSON are mostly gone by now
  • Once you do get VS Code up and running and begin editing your JSON:
    • The intellisense and syntax checking are very limited
    • There is no preview of your format
    • While some examples exist, there’s still a huge learning curve

I previously released a verbose schema which makes editing in VS Code a lot easier, but still doesn’t solve the preview problems, learning curve, or the need to use a tool outside of O365.

Column Formatter

ColumnFormattingChristmas4

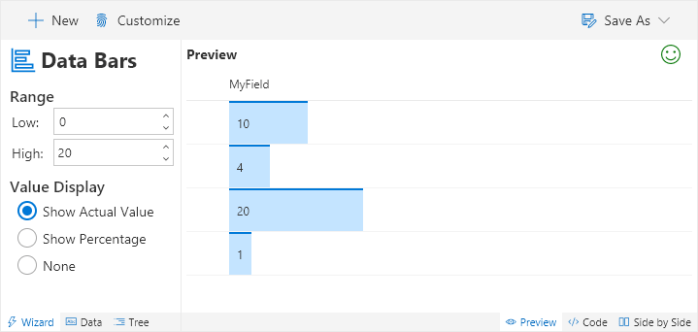
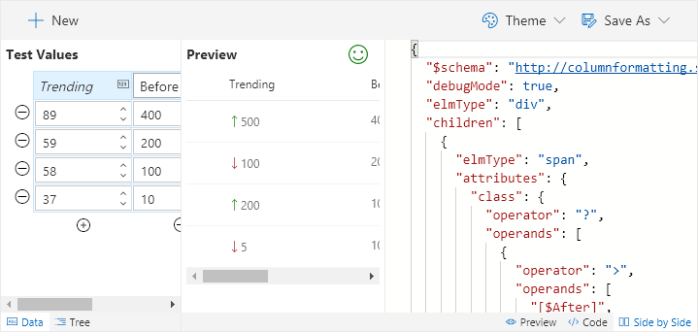
Column Formatter is a SharePoint Framework client-side webpart I’ve created using React and Redux. It’s designed to give the full power of VS Code editing while providing easy to use templates and wizards all within the browser! The goal is to make writing and applying Column Formatting easier and quicker for both developers and end users.

Development Details

I originally set out to make an Application Customizer SPFx extension that would sit directly on the modern listview page. Unfortunately, there aren’t APIs available (at least that I could find) to load the CustomFormatter library on the page if none of the columns are using it yet, nor a way to trigger applying the formatting to the listview without actually changing the field’s CustomFormat value.

So I’ve extracted the CustomFormatter library into my project and am faking it by providing it only the dependencies it actually needs. While this gives me full control to enable “as you type” live preview of rendering, it also means that things could get out of sync with O365 development. For now, I’ll do my best to keep things updated but ultimately I’d like to be able to load the office CustomFormatter module on demand.

Similarly, I had to extract the styles of the modern listview and the unique classes for CustomFormatter.

The editor is a custom build of the Monaco Editor (the editor that powers VS Code). Getting this built as a module that worked in SPFx was a real challenge, but worth it because of the immense power it adds.

This was my first experience with Redux. It was hard to wrap my head around at first and there is a significant amount of boilerplate code required (largely to play nice with Typescript), but I wouldn’t do any React webpart of even minor complexity without it! It simplifies state management and makes additional iterations of features much easier.

What’s next

There are a few templates and wizards included currently, but there are way more that could be added. I plan to keep adding these and am open to both pull requests and suggestions.

DataBarsWizard
Wizards make it easy to generate Column Formatting without writing any code
TrendingTemplate
Templates provide you with starter code and sample data

I have submitted this webpart as an entry in the Hack Productivity 3 hackathon (Go vote for it, please!) which is why it’s currently hosted on my github. I’d like to get it included in SharePoint PnP if they’re open to it, although I’m not sure where it should go just yet.

More Information

You can find a lot more details about features and how to use Column Formatter in the ReadMe in the repo. I also created a demonstration video that covers a lot of the features:

Adjusting VS Code Language Associations

Applies To: Visual Studio Code

Have you ever opened a file in VS Code and there was no magic highlighting? Your first response is likely to weep and curse the heavens. Fortunately, the heavens have heard your cries and you can quickly fix things with just a couple of settings tweaks.

PlainText
Plain Text!!? That is clearly the incredibly popular webpart file type!!

This can happen if you decided to use your own proprietary filetype for some standard format (like XML) or more likely you are trying to open someone else’s proprietary filetype for some standard format (like XML).

All you need to do is clue VS Code into how it should treat those types of files. This is done in your user settings. To open your settings just hit Ctrl+[Comma] or you can open them from the File > Preferences > Settings menu option.

The setting we are looking for is files.associations. You can find this by typing it in the Search Settings box. To edit the setting, just click the pencil icon next to it and choose Copy to settings. This will copy the setting over to your user settings file where you can add your values:

SettingCopy

Each association is just a key/value pair. You can have as many of these as you like (just separate them with a comma). The key is a glob pattern that will match on the full filename. If you include a / then it will actually match on the full file path. For simple file extensions matches, just use a wildcard (*) followed by the extension.  Here’s what mine looks like for .webpart files:

association

As soon as you save and go back to your file you’ll see the magic applied:

MagicColors
Wowee! Now I can get back to manually editing exported web parts! yay?

You can read more about how all this works here.

Also, for those that didn’t spot it above, my pretty colors are from the Blackboard theme.

Changing Web Part Properties When the Page is Unavailable

Applies To: SharePoint

The other day we made some changes that caused some issues with how one of our web parts was configured. Unfortunately, I hadn’t wrapped the problem in a try/catch and my error blew up the whole page. I’m sure I’m the only one that’s ever done that. So obviously I’ve got some code changes to make, but what do I do in the meantime? Fortunately, there’s some straight forward Powershell that lets you change web part settings (even custom properties like mine).

I found the solution to this over on Aarebrot.net where he was using the technique to change a web part that automatically redirected the user. I’ve just reproduced his code here and added some explanation and background.

When I first went to solve this problem I tried the ?contents=1 querystring trick to pull up the Web Part Administration page. If you’re looking for a quick solution you can add that query string to the end of your page’s URL and then delete the web part from the page and start over. But a more elegant solution is to just change the offending property using some easy Powershell.

Using the SharePoint 2010 Management Shell, run the following commands:

$web = Get-SPWeb "http://somedomain.com/sites/someweb"
$page = $web.GetFile("default.aspx")
$page.CheckOut()
$wpm = $web.GetLimitedWebPartManager("default.aspx",[System.Web.UI.WebControls.WebParts.PersonalizationScope]::Shared)
$part = $wpm.WebParts[0]
$part.SomeProperty = "The correct setting!"
$wpm.SaveChanges($part)
$page.CheckIn("Fixed that property")
$page.Publish("Fixed that property")
$web.Close()

What Just Happened?

In line 1 we’re just getting a reference to the web site (SPWeb) where your web part lives using Get-SPWeb. Just replace the URL shown with yours.

Lines 2-3 and 8-9 are only required if the page you’re modifying is on a publishing site or check in/out is required. Feel free to skip these (go directly to line 4) if you’re just editing a simple page. If your page does require check out to be edited, line 2 is simply retrieving the file (SPFile) using the GetFile method using the relative location of the page. Then line 3 calls the CheckOut method which, of course, checks out the file.

In line 4, we’re grabbing a reference to the Web Part Manager for the page (SPLimitedWebPartManager) using the GetLimitedWebPartManager method. Just replace the first parameter with the relative location of your page. The second parameter is the PersonalizationScope enumeration and can be User or Shared. You’re going to want to use Shared to affect everybody. The Web Part Manager object is what lets us get access to all the web parts on the page and screw with em.

In line 5, we grab the web part (WebPart) we want by index using the WebParts collection. In the example above I already knew that the web part I wanted was the first one in the collection. You can also pass the uniqueID property of the web part (instead of the index). You can find out both by simply calling the WebParts collection by itself ($web.WebParts) and everything will get listed to the screen.

To see all the available properties of the web part you can just type ($part) and it will list everything out including any custom properties. Then you can just set them like we do in line 6.

Line 7 uses the Web Part Manager’s SaveChanges method to incorporate all your changes. Lines 8-9 are again only required if your pages library requires check in/out and publishing. If it’s a simple page just skip to line 10. Line 8 uses the CheckIn method which takes a string for a check-in comment. Line 9 uses the Publish method which also takes a string for a comment.

Line 11 just calls the Close method and ensures we clean up all our resources.

That’s it! Now you can wrap that up in a script to loop through multiple pages and change properties on all sorts of web parts or just one-off fix those web parts you might have broken.